
Making the cut-out and preparing the wall
Use the cut-out drawing from the datasheet and work with nibblers or a routing jig, not an angle grinder; heat distorts the sheet and the gasket no longer seals. Deburr every edge, since a burr cuts the gasket and forms a leak path. Finally degrease with isopropanol.
Fitting grommets and laying in cables
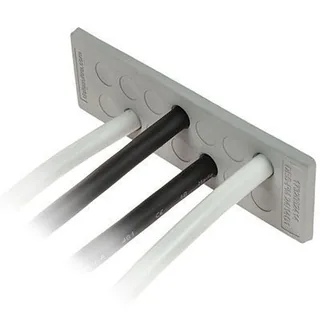
Place heavy cables at the bottom and signal cables at the top so weight rests on the frame beam. Lay the cable into the opened grommet without stretching the membrane over a sharp connector edge: slide the grommet onto the sheath at least 200 mm from the connector, then move it into place. Label every cable before closing.
Closing and tightening the frame
Fill all empty positions with blanking plugs — one open slot drops the assembly to IP20. Tighten bolts crosswise in two passes: hand-tight first, then to the specified torque (often 2.5 to 4 Nm). Over-tightening deforms the grommet row and actually creates gaps.
Final check and maintenance
Pull each cable with roughly 100 N: it must not shift. Check the perimeter gasket for even compression and, outdoors, spray-test with water. Include the frame in annual inspection; grommets harden after years of UV and heat and then lose clamping force.
| Step | Action | Watch out |
|---|---|---|
| 1 | Uitsparing frezen | Exact maatvoering |
| 2 | Ontbramen en ontvetten | Geen bramen onder pakking |
| 3 | Pakking plaatsen | Droog, niet invetten |
| 4 | Tules op kabels schuiven | 200 mm van stekker |
| 5 | Kabels inleggen | Zwaar onder, signaal boven |
| 6 | Blindstoppen plaatsen | Alle vrije plaatsen |
| 7 | Bouten kruislings | 2,5–4 Nm |
| 8 | Trektest en spuittest | 100 N per kabel |
Frequently asked questions
- How tight should the bolts be?
- Follow the datasheet; usually 2.5 to 4 Nm in two crosswise passes. Use a torque screwdriver on plastic frames.
- Can I replace one cable without dismantling the whole frame?
- Yes with a split frame: loosen the bolts, open, swap the grommet with the cable and close again. Replace the grommet itself at the same time, since used membranes clamp less.
- Should I re-torque after installation?
- Under vibration yes: check torque and cable retention after roughly 100 operating hours and annually thereafter.
Products from this article
Available from stock, with volume discounts from 10 pieces.

Read next
- How many grommets and which frame size do you need?From cable list to frame size: grommet size per diameter, occupancy rules and 20% reserve.
- Cable entry systems: frames, grommets and brush sealsThe three main entry types, what they do and do not seal, and when you need a split frame.
- Which cable entry do you choose for pre-terminated cables?Split grommet, frame or snap entry: packing density, IP rating and strain relief compared.